The Fundamentals of Counted Thread Stitching
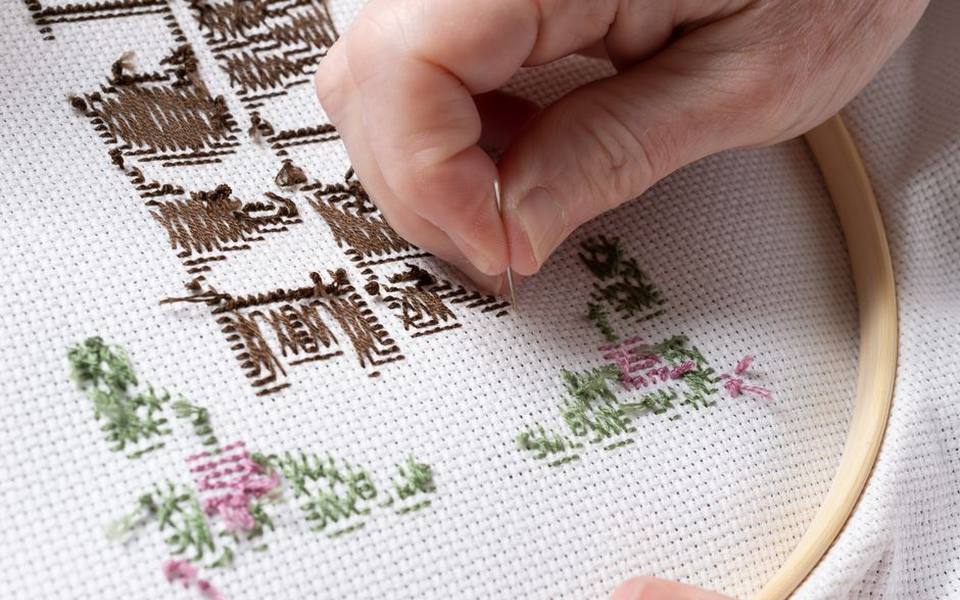
Cross stitch is one of the oldest and most straightforward forms of hand embroidery. Unlike freeform surface stitching where an artist draws lines directly onto plain cotton or linen, counted cross stitch relies on a uniform grid. Crafters form tiny X-shaped stitches across open-weave squares to gradually build complex images, geometric samplers, or decorative typography. Because the grid dictates stitch placement, anyone can achieve crisp, uniform results simply by following a visual chart and maintaining consistent thread tension.
Beginners often confuse hand cross stitch with surface embroideries or machine-driven monogramming. Surface embroidery incorporates dozens of different stitch types, such as satin stitch, French knots, split stitch, and stem stitch, executed on tightly woven fabric. Cross stitch primarily uses just one basic stitch, occasionally accented with straight backstitching for outlines or half-crosses for subtle shading. That structural simplicity makes it remarkably approachable, even for people who have never held a needle before.
Getting started requires only a modest initial investment. You do not need expensive specialized equipment to produce beautiful work, but having the proper foundation makes a noticeable difference in your experience. The core supplies consist of four elements: an open-grid ground fabric, stranded cotton embroidery floss, a blunt tapestry needle, and a charted design. Understanding how these components work together will prevent puckering, thread tangling, and sizing mistakes on your early projects.
Selecting the Right Aida Cloth and Thread Counts
Aida cloth is the quintessential cross stitch material, recognized by its distinct woven blocks that form clearly visible holes at each corner. Woven from 100 percent natural cotton, this fabric is naturally stiffened during manufacturing to help maintain tension while you work. When browsing fabric bolts or pre-cut packages, you will notice a number attached to the material, referred to as the fabric count. The count indicates how many individual squares or potential stitches exist per linear inch of cloth.
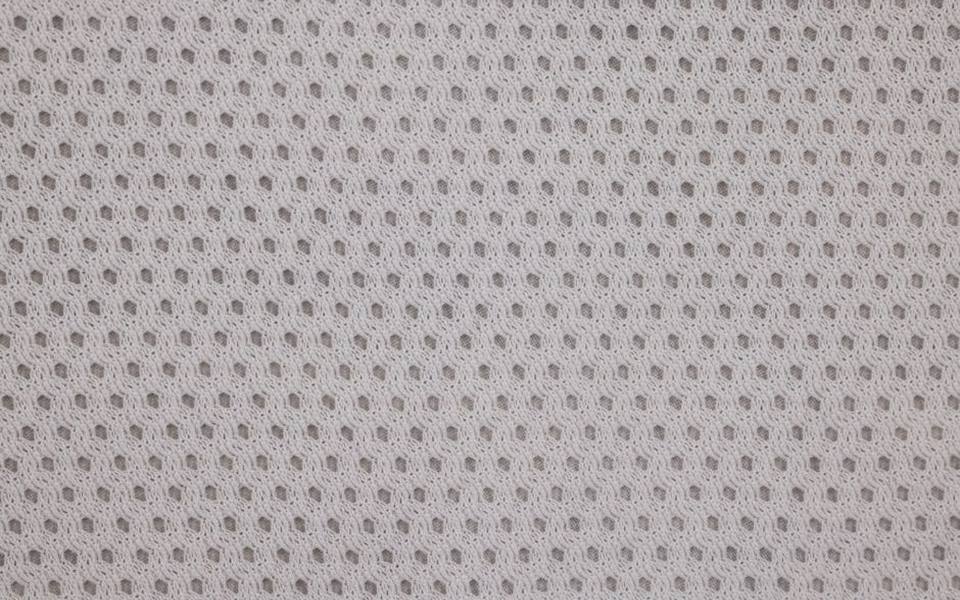
Common Aida sizes range from 11-count up to 18-count, with 14-count serving as the universal standard for beginners. On 14-count Aida, fourteen cross stitches fit into a single inch, creating a design that balances comfortable visibility with crisp detail. If you prefer larger holes that are easier to see without magnification, 11-count cloth provides a forgiving canvas. Conversely, 16-count and 18-count fabrics produce much finer, pixel-dense finishes that hide the underlying grid structure, though they require sharper vision and smaller needles.
Calculating your project dimensions before cutting fabric prevents frustrating shortages later. If a pattern chart measures 140 stitches wide by 140 stitches high, stitching it on 14-count Aida results in a finished motif exactly 10 inches square. Stitching that exact same pattern on 18-count fabric shrinks the finished design down to roughly 7.7 inches square. Always add at least two to three inches of extra border fabric on all four sides to allow room for framing, hooping, or edge finishing.
Exploring Linens, Evenweaves, and Specialty Grounds
While woven Aida cross stitch fabric remains the most popular choice, intermediate and advanced stitchers frequently transition to evenweave fabrics and pure linen. Evenweaves are woven with uniform synthetic or cotton-blend threads, offering a softer drape and a less pronounced grid. Linen provides a textured, organic surface with subtle irregularities called slubs. Both materials are typically worked 'over two' threads, meaning you skip one vertical and one horizontal thread for every leg of the cross stitch.
Stitching over two threads on a 28-count evenweave produces the exact same finished size as stitching over one block on 14-count Aida. Crafters often favor linen and evenweave for designs featuring fractional stitches, specialty border bands, or exposed unstitched background areas. Because the weave is less rigid than Aida, the background looks like finished heirloom cloth rather than a utilitarian craft grid. However, working over two threads demands closer attention to avoid accidentally splitting threads.
If you want to place cross stitch motifs onto garments, denim jackets, or home decor, specialized transfer materials make that possible. Waste canvas is a temporary grid basted to everyday textiles, stitched through, and then moistened so individual threads can be pulled out one by one. Water-soluble canvas operates similarly but dissolves completely in warm water. These specialty materials allow you to carry counted motifs far beyond framed wall art and onto wearable or functional textiles.
Navigating Stranded Floss and Thread Palette Systems
Standard embroidery floss is sold in eight-meter skeins composed of six individual strands spun loosely together. One of the most common beginner mistakes is attempting to stitch with the entire six-strand thickness straight from the skein. Instead, cut a manageable length of floss—typically 18 inches—and gently separate individual plies. Most cross stitch patterns indicate how many plies to combine, which typically ranges from one to three strands depending on the fabric count.
On standard 14-count cloth, stitchers typically use two strands for full crosses and a single strand for delicate backstitch outlines. Using two strands provides adequate fabric coverage while allowing the needle to glide smoothly through the holes without pulling or distorting the weave. If you step down to 11-count cloth, you may need three strands to prevent the white background from showing through your stitches. On tighter 18-count Aida, two strands create an exceptionally dense, solid finish.
The needlework world relies heavily on standardized floss numbering systems, with major manufacturers cataloging hundreds of distinct shades. Charts display these standardized color codes in their legends so you can purchase exact matches at local retailers or fiber shops. Beyond standard mercerized cotton, manufacturers produce variegated color-shifting skeins, metallic threads, and natural silks. Metallics add striking shimmer to holiday motifs, though they tend to fray and generally require shorter working lengths and thread conditioner.
Reading Charts, Legends, and Pattern Symbols
Counted cross stitch patterns rely on visual grid charts where every square represents a single stitch on your fabric. Because hundreds of color shades exist, charts rarely rely on solid color printouts alone, which can lead to confusion between closely related hues. Instead, pattern publishers use distinct symbols inside each grid square—such as circles, triangles, arrows, or letters—to correspond with specific thread numbers listed in the pattern legend.
The pattern legend serves as the master key for your project. It lists the symbol, the thread code, the descriptive color name, and the recommended number of strands for both cross stitches and backstitches. Backstitches appear on charts as crisp straight lines running along grid borders or slicing diagonally across squares. French knots, commonly used for eyes or floral textures, appear as small dots positioned at grid intersections. Reviewing the legend thoroughly before making your first stitch ensures you pull the right floss plies.
Before beginning, locate the center of both your design and your fabric. Charts always feature small arrows or bold dividing lines along the outer margins marking the exact horizontal and vertical midpoints. To find the center of your cloth, fold the fabric in half horizontally and then vertically, creasing the center intersection lightly with your fingers. Starting your project from the center prevents alignment errors that could leave your motif running off the edge of the cloth.
Choosing Between All-in-One Kits and Individual Supplies
For beginners, pre-packaged cross stitch kits offer the simplest path into the craft. A quality kit contains everything required to complete a specific motif: pre-cut Aida cloth, pre-sorted floss cards, an appropriately sized needle, and printed instructions. Purchasing a kit eliminates the guesswork of matching fabric counts to needle gauges and calculating floss skein quantities. They make excellent gifts and provide immediate gratification for crafters wanting to test the waters without accumulating surplus supplies.
However, experienced stitchers often prefer buying patterns and materials separately. As an independent stitcher, purchasing individual charts allows you to customize every aspect of the project. You can substitute standard white Aida for hand-dyed oatmeal linen, swap bright primary colors for muted vintage tones, or change project dimensions to match vintage frames. Sourcing supplies individually is also more economical when tackling larger heirloom patterns that share common thread colors across different designs.
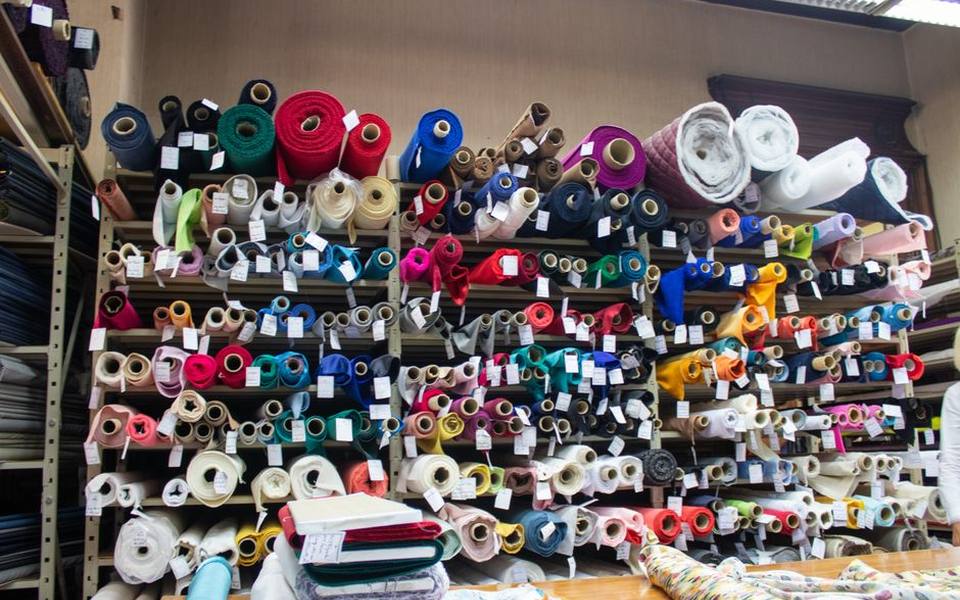
When shopping for supplies or seeking advice on materials, visiting an established local retailer can provide hands-on inspiration. You can locate independent specialty shops across the country through local fabric directories, where staff often understand ground counts, needle sizes, and framing requirements. Local stores typically carry an extensive selection of floss skeins and pre-cut fabrics that allow you to inspect color accuracy under natural lighting before committing to a lengthy project.
Essential Notions: Needles, Tension Hoops, and Cutting Tools
Using the correct needle makes stitching smooth and protects your cloth from damage. Cross stitch requires a blunt tapestry needle rather than a sharp sewing or crewel needle. A blunt tip glides smoothly into the pre-existing holes of the Aida weave without piercing the fabric threads or splitting nearby stitches. Tapestry needles are sized numerically, with higher numbers indicating thinner shafts: size 24 is ideal for 14-count Aida, while size 26 or 28 works best on 16-count and 18-count grounds.
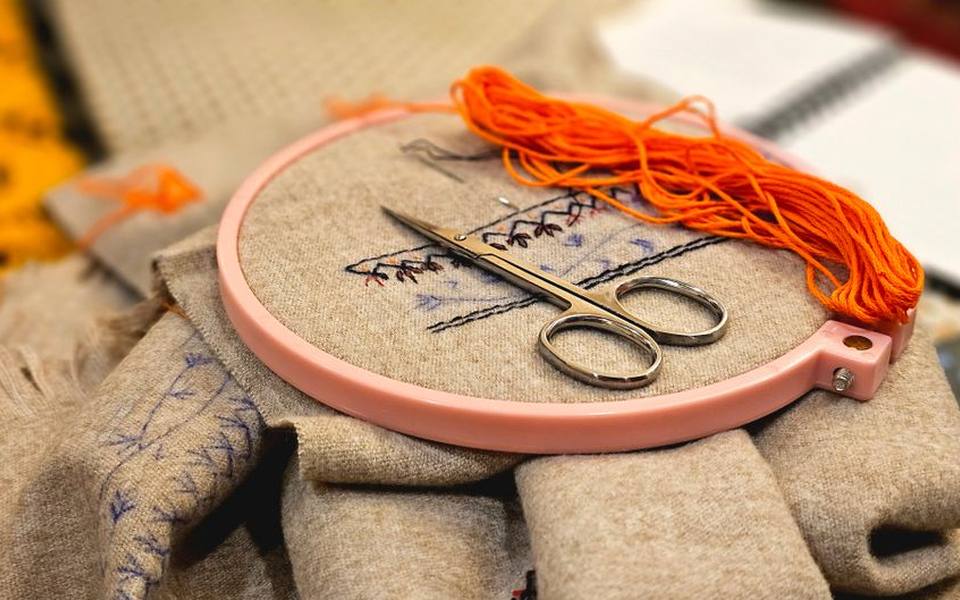
Fabric tension tools keep your stitching surface taut and stable. Round wooden or plastic embroidery hoops are portable, inexpensive, and suitable for small-to-medium pieces. Snap-together plastic frames (often called Q-snaps) clamp fabric using grooved outer sleeves, which minimizes permanent hoop creasing on delicate fibers. For massive multi-page charts, rotating wooden scroll frames keep large yards of fabric rolled neatly out of the way without flattening completed stitches.
A few small accessories will significantly enhance your stitching comfort. Sharp, pointed embroidery snips allow you to trim thread tails flush against the fabric back without catching surrounding strands. Needle threaders designed for heavy-ply floss save time and eye strain, while magnetic needle minders keep your needle anchored to the fabric surface when you pause. Good direct task lighting and optical magnification can also prevent fatigue during extended evening stitching sessions.
Stitching Mechanics, Tension, and Clean Backs
Achieving a smooth, professional appearance comes down to consistency. When forming cross stitches, always ensure the bottom and top diagonal legs run in the same direction throughout the entire piece. A common standard is working the bottom leg from bottom-left to top-right (/), followed by the top leg from bottom-right to top-left (\). If you alternate directions randomly, light will reflect off the thread irregularly, making the finished surface look lumpy and uneven.
Thread tension should be firm enough that stitches lie flat against the cloth without pulling the fabric holes wide open. If your cloth puckers inside the hoop or your crosses look distorted, you are pulling the working thread too tightly. Conversely, leaving thread loops too loose invites snagging and results in a messy, unfocused image. Finding the sweet spot takes a little practice, but your hands will settle into a natural rhythm within an hour of steady work.
Never secure your floss with large knots on the reverse side of counted thread projects. Knots create noticeable lumps when the piece is mounted and framed, and they can pull through wide-count fabric over time. Instead, utilize the loop start method for folded two-strand floss, or secure ends by running your needle beneath three or four existing stitches on the back. Keeping the reverse side neat prevents dark threads from shadowing through light-colored fabrics.
Expanding from Simple Samplers to Advanced Fiber Crafts
As your confidence grows, counted cross stitch opens the door to expansive, intricate projects. Full-coverage patterns translate classical fine art paintings into thousands of tiny stitches across dozens of charted pages. These advanced projects introduce blended thread needles, where you combine one strand of two different colors on a single needle to create photographic gradients. Tackling larger projects is a deeply rewarding, meditative hobby that can occupy months or years of enjoyable leisure time.
Many stitchers integrate their finished cross stitch panels into wider textile projects. A completed cross stitch sampler can become the focal medallion of a quilted pillow, a wall hanging, or a decorative tote bag. If you want to develop the sewing skills needed to join stitched panels into quilts, exploring quilt shops with classes can provide expert guidance on patchwork borders and finishing. Combining counted thread art with pieced cotton borders creates truly unique handmade family heirlooms.
Other crafters enjoy alternating between hand cross stitch and modern machine stitching. While handwork offers quiet, rhythmic relaxation, computerized equipment can produce rapid decorative lettering and commercial logos. Exploring local studios specializing in custom embroidery and monogramming illustrates how computerized needles interpret digitized stitch files, offering a fascinating contrast to the manual precision of traditional counted cross stitch.
Finishing, Washing, and Archival Display
Once the final stitch is placed, your project requires careful finishing before it is ready for display. Over weeks of stitching, natural oils from your fingers, dust, and hoop marks inevitably settle onto the fabric. Washing your completed piece restores its crisp appearance, but you must take precautions to prevent thread bleeding. Submerge the cloth in lukewarm water with a tiny drop of gentle, dye-free dish liquid, swishing it gently without scrubbing or wringing.
Rinse thoroughly in cold running water, then lay the wet piece face down between clean white terry cloth towels to blot out excess moisture. Never tumble dry or hang wet needlework. While still slightly damp, press the work face down onto a plush towel using a medium steam iron. Pressing face down ensures that the hot iron plate does not crush the dimensional texture of your raised cross stitches, leaving the background crisp and the stitches plump.
Proper framing protects your work from environmental degradation for generations. Rather than gluing fabric directly to cardboard, lace the excess border cloth across acid-free foam board using heavy cotton thread, or secure it with stainless steel mounting pins. Framers often recommend using spacers or a custom mat board to keep the framing glass from pressing directly against the threads. This air gap prevents condensation buildup and keeps the thread fibers from flattening over time.
Published 2026-09-21 · reviewed with each rebuild, last September 2026.
Find quilt & fabric shops near you
The directory lists 33,981 quilt & fabric shops by state and city — pick your state or use the “Near me” button in the header.
More guides
-
 Buying
Where to Buy Fabric: Sourcing Alternatives Online and Locally
-
 Service
DIY Zipper Repair and Simple Clothing Alterations Guide
-
 Buying
Beginner Embroidery Kits and Thread Selection: What to Know Before You Stitch
-
 Buying
Where to Buy Yarn for Knitting and Crochet: Sourcing Guide
-
 Buying
Beginner's Guide to Quilting and Essential Sewing Supplies
-
 Buying
Essential Guide to Sewing and Quilting Notions
-
 Owning
How to Make a DIY T-Shirt Quilt: Step-by-Step Guide
-
 Buying
Choosing Beginner Sewing Machines: Janome Models and Maintenance Costs
-
 Buying
Jelly Rolls and Precut Fabrics: Sizes, Quilt Patterns, and Buying Guide
-
 Buying
Fabric Selection Guide: Cotton, Linen, Velvet, Fleece, and Synthetic Blends
-
 Buying
Quilting Patterns, Blocks, and Techniques: From Log Cabin to Paper Piecing
-
 Service
Complete Guide to Clothing Alterations and Tailoring Services
-
 Owning
Sewing Machine Needles, Bobbins, and Thread Compatibility Guide
-
 Owning
Beginner Sewing Machines: Selection, Oiling, and Repair Basics
-
 Buying
Sunbrella and Outdoor Fabrics Guide: Selection, Cushions, and Care